Travertine Paver Pool Deck and Travertine Patio Installer South Carolina, Tennessee and North Carolina
During the months of December, January and February, we are offering installation of travertine pool decks in South Carolina and Tennessee. During the warmer months of the year, we install travertine pool decks in Ohio and Kentucky. However, do to the colder temperatures in these months, we travel down south where it’s warmer so that we can keep our employees working year around.
We’re considered to be experts in the installation of travertine pavers. We’re frequently contacted by architects and installers asking for installation recommendations. We’ve been installing travertine pavers for many years and offer a highly experienced installation approach different from most other installers. You’re probably finding out, if you’ve been in the search for a travertine paver installer for awhile, that there aren’t very many, if any, installers that specialize in travertine pavers. Or even one that’s ever installed travertine pavers.
In addition to being highly experienced in installation, we also have found the best travertine suppliers over the years and we’ll help you select the right travertine. As you may already know, there are many different grades of travertine.
If you’re interested in discussing your travertine pool deck or large travertine paver patio, here are the minimum requirements and next steps:
Your travertine pool deck or patio must be a minimum of 2,000 sq ft.
Your project must get installed between Jan 1st and Feb 31st.
You must be located where it stays above freezing during these months.
The cities below are our ideal areas, however, if you’re located near one of these areas, don’t hesitate to ask:
South Carolina
Greenville
Spartanburg
Myrtle Beach
Charleston
Hilton Head Island
Tennessee
Nashville
Knoxville
Memphis
North Carolina
Charlotte
Winston Salem
If this sounds like something you’re interested in discussing further, please email me, Mark Rhodus at mark@twobrothersbrickpaving.com. Let me know some details regarding your project.


The Power Of Properly Installed Proper Paver Edge Restraint
Probably one of the most important aspects to a long lasting paver patio is the paver edging. Keeping the edges of pavers contained is crucial to maintaining interlock between the pavers. Part of how pavers achieve interlock is by the course sand setting bed being forced into the joints of the pavers, if the pavers aren’t restrained around the perimeter, the pavers will separate over time causing a loss of interlock in the joints.

Common Problems/Failures in Plastic PVC Paver Edge Restraint
Black Paver Edging Popping Up
As you can see in the picture below, the paver edging wasn’t installed correctly and as a result the edge pavers are moving away from the rest of the pavers.
I’ve mentioned in previous articles that I also own a company that specializes in the repair, cleaning and sealing pavers and one of the most requested repair’s we do is fixing edging that has raised up.

Brick Edge Restraint and Border Pavers Shifting

As you can see in the picture below, the paver edging wasn’t installed correctly and as a result the edge pavers are moving away from the rest of the pavers.
How to install paver edging
OK, so we agree that paver edging is important and it must be installed correctly. There are 3 very basic steps that you must follow to guarantee that your paver patio, walkway or driveway will last and you won’t have issues with your edging popping up over time.
I’ve created a very handy installation guide and video that shows you step by step how to properly install edging like a pro.
In addition to the installation guide, I’ll also show you a specific paver edge restraint that we use on all our projects. This edge restraint is the only one of it’s kind due to a patent. If you use this edging, it’s nearly impossible for your edging to pop up over time. It can be a little difficult to find, and most paver suppliers do not carry this style of edging. If you have trouble locating it, I’m happy to sell/ship you out what you need.
In addition to the patented edge restraint, I’ll also share with you the best paver spikes to use. The spikes we use are designed to stay in place after installation due to their ribbed sides. Most spikes have smooth sides allowing them to easily slide out after installation. We can sell/ship these out with your edging too.
If you’re planning to build your paver patio yourself, you’re likely spending well over $1,000. For $20, you can rest assured that one of the most critical aspects of your installation was done like a pro. As I said above, edge restraint repair is one of the most common repairs we do.
Get the Guide Now
Paver Edging Repair
If you’re like so many others who have paver edging failures, you’re probably very frustrated. In our guide, we’ll also show how to fix your paver edge restraint. On 95% of our edging repair jobs, we replace the existing edging with new edging that’s designed not to pop up over time and install our new spikes.
How to Install and Repair Paver Edge Restraint Guide: Click Buy Now Below
[one_half]
[/one_half]
[one_half_last]
[/one_half_last]
Leave us a comment!
Over the past few years, polymeric sand and joint stabilizing paver sealer has become more and more popular. At Two Brothers Brick Paving, we prefer to use a joint stabilizing paver sealer over polymeric sand whenever possible. For the most part, they achieve similar results in the joint – keeping the sand in tact. In this article, I’m not going to discuss the pros and cons of paver sealer vs polymeric sand (I’ve already done so in an earlier article on polymeric sand), instead I’m going to share with you how to properly install paver sealer. Note that our sister company, Perfect Paver Co, offers paver sealing in Dayton, Ohio.
Step 1. If you’re sealing a paver patio that’s been down for sometime, you’ll want to make sure and remove all vegetation growing in the joint. This can be done usually by pressure washing with a high psi pressure washer. You should be able to blow the vegetation right out of the joint.
Step 2. Clean the pavers. Almost always, we recommend pressure washing pavers before sealing. It will require that you do step 3, however, it will achieve the best end result. Using a 3500 psi pressure washer and a fan style tip, take your time going over every square inch of the pavers. If needed, go back over a second time. Just make sure to hold the pressure washing wand about 8″-10″ away from the pavers because if you get too close you can cut grooves in the pavers. Again, make sure you’re using a fan tip and not a jet tip. If you have rust stains or any other stains that won’t come out, try cleaning with a general purpose cleaner sold by Surebond.

Step 3. After the pavers have dried for at least 24 hours in direct sunlight (may take longer in shaded areas or cooler times of the year), you’re ready to re-install the joint sand.
Advanced Version: We recommend that you fill the joints with the same course sand that was used for the setting bed (what the pavers are laid on top of) to fill up the joint. This can be difficult to do without a vibratory plate compactor as the size of the sand is a bit larger than most paver joints. The vibratory plate compactor will vibrate and force lodge the sand into the joint. Most gravel distributors will carry this sand; they call it concrete sand or course sand. You will need about 1- 5 gallon bucket of this sand per 100-200 square feet of pavers. You’ll want to evenly spread the sand out over the patio covering every square inch. We use a base rake but you can use a push broom. Take the top of the broom and put it one the pavers creating a plow affect. Push the broom around upside down going back and forth over the pavers until the sand is evenly spread over all the pavers (about 1/8″ thick). If your sand is wet or damp at all, you will need to spread your sand out first so that the sun can dry it out. Then you will be able to broom it around easily to get the even layer.
Once the patio is covered with a consistent layer of dry sand, you’re ready to compact. Using a vibratory plate compactor, go over top of all the pavers. Spread the sand back out with your broom and go over them one additional time. Now sweep off the sand and the joints should be full. You’ll want to remove the sand so that the sand is just below the sharp edge of the paver aka the chamfer. For tumbled pavers that don’t have a sharp edge, we recommend that the sand be about 1/16″-1/8″ down from the edge of the paver. You can use a blower to achieve the desired level of sand in the joint. Blow off the patio very good when you’re done to make sure there are no particles of sand sitting on top of the pavers.

Simple Version: If you lack the tools and time needed for the advanced version, you can go about it this way and achieve a similar result. The only down fall is that the sand that you must use is smaller and can easily gets removed from the joints in time.
After you’ve completed step 2, you’ll need to get sand back into the joints. In this simple version, you can use mason sand or fine sand. Most Home Depots will sell bags of Quikrete Mason Sand in the same isle as the bagged concrete. You can also get mason sand from your local gravel company in bulk form. If you’re getting bags, you’ll need about 1 bag per 100 square feet. This sand is much finer and will fall right into the paver joints making it easier to fill the joints without the use of vibratory compaction equipment. Sweep the dry sand (must be dry and the pavers must be dry) into all of the joints keeping the sand about 1/16″ – 1/8″ down from the edge of the paver. When all of the joints are filled, use a blower to remove any excess sand sitting on top of the pavers.
Step 4. You’re now ready to apply the paver sealer. Just make sure that the pavers are 100% dry, the sand in the joint is 100% dry and there is no rain in the forecast for at least 24 hours. The paver sealer we use most often is made by Surebond and it’s called SB-1300. It’s a water based sealer that penetrates into the surface of the paver and also has the bonding additives that will harden the sand joint. You’ll need a pump up sprayer and a squeegee.
Fill your pump up sprayer with the paver sealer – do not dilute. Start spraying the paver sealer directly on the pavers at a rate of about 80 square feet per gallon. Once the paver sealer starts to pool in the joint, you’ll know you’re ready to move on. It’s best to have a second person running the squeegee. The idea of the squeegee is to pull the paver sealer from the top of the pavers down into the joints as you want about 75% of the sealer in the joints to fully harden the sand. Pretty much as soon as you start spraying, your squeegee person should start squeegeeing. If you we’re using a paver sealer that isn’t a joint stabilizing sealer, then you wouldn’t need to use the squeegee and you could pretty much just spray on the paver sealer with a much higher coverage rate.
Here is a video done by Surebond to show how its done. //www.youtube.com/embed/HZpnYnBAfd4
Best of luck with your paver sealer project. If you would like to speak with us about sealing your project for you, please don’t hesitate to contact us here. We offer paver cleaning and sealing services in Dayton, Cincinnati, and Columbus areas.
Have a question? Leave us a comment!
We are a specialty travertine paver installer. We install travertine pavers in Ohio. We also install in Kentucky, Indiana, and Michigan for projects over 1,000 sq ft and beyond for projects over 5,000 sq ft.
For travertine installation, Contact us here. If you’re looking to purchase high quality travertine pavers, click here.
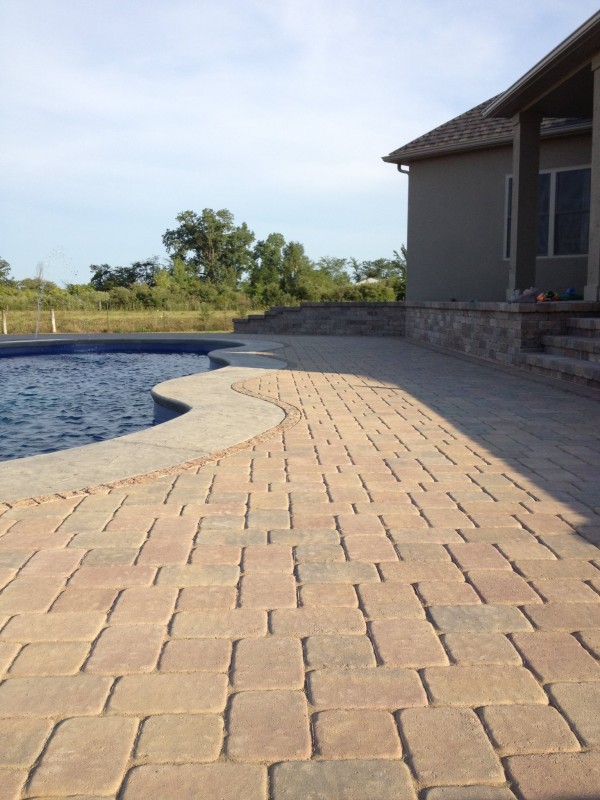
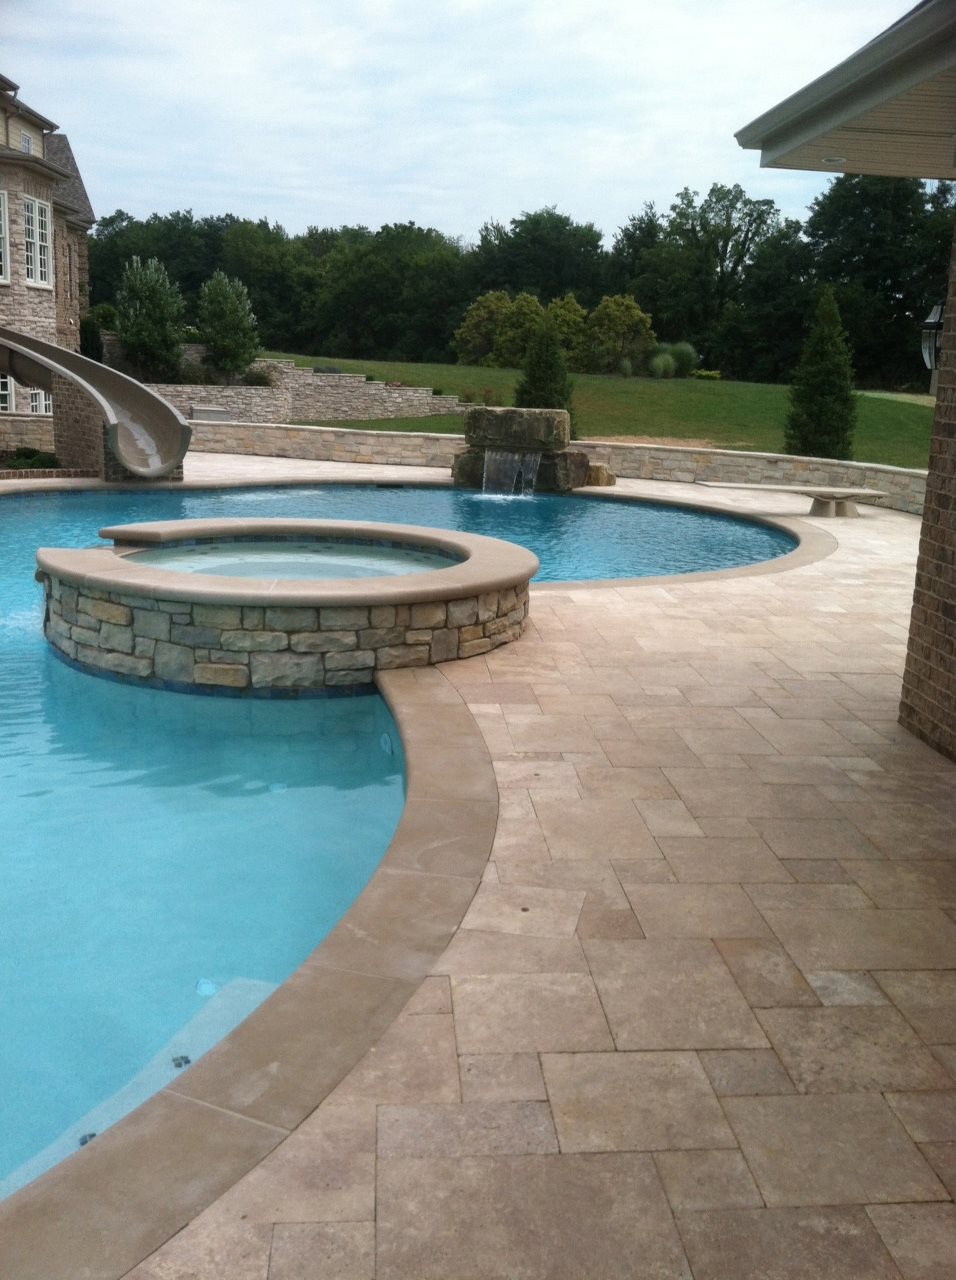
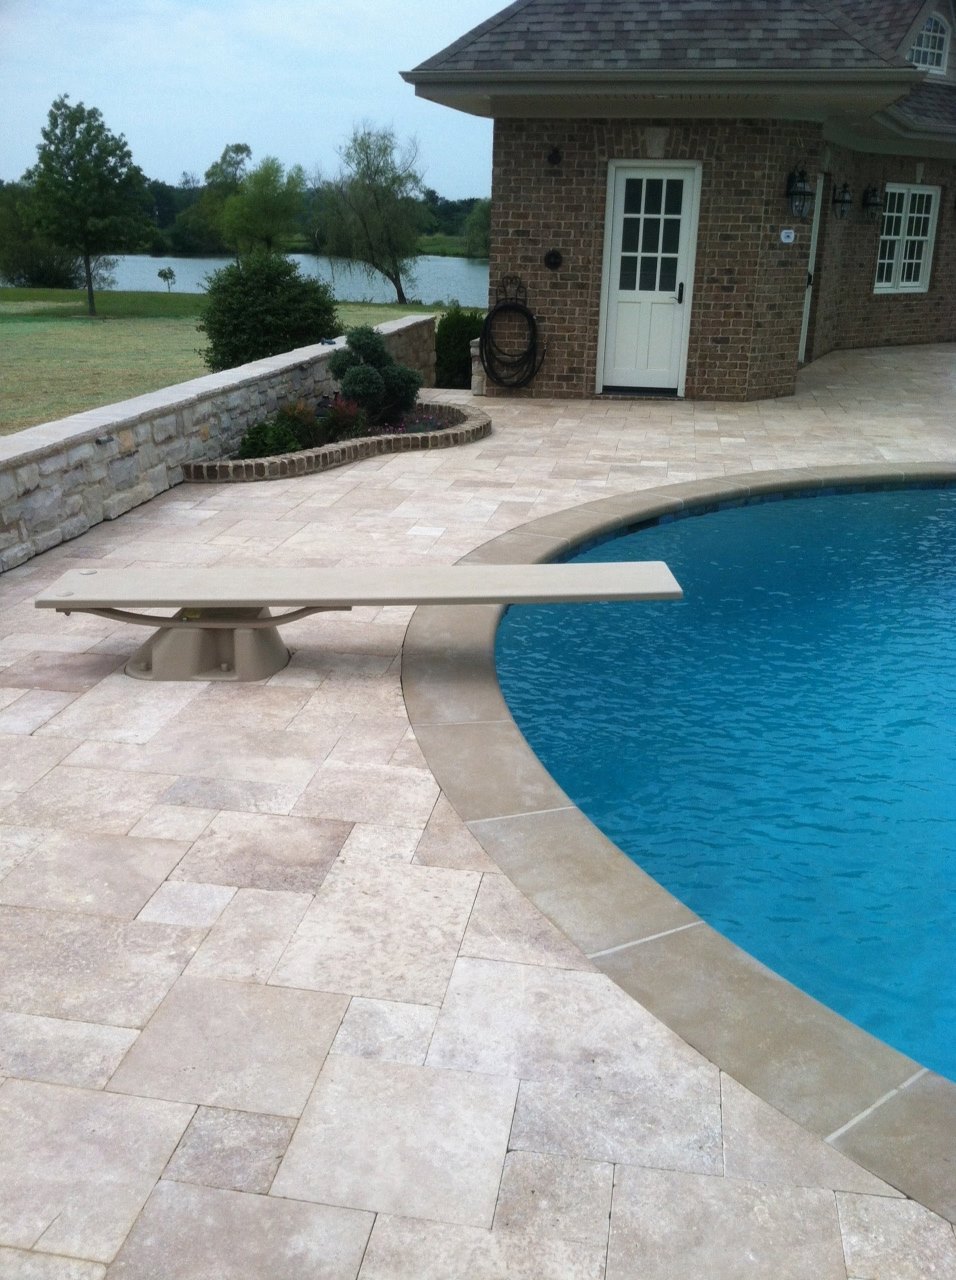
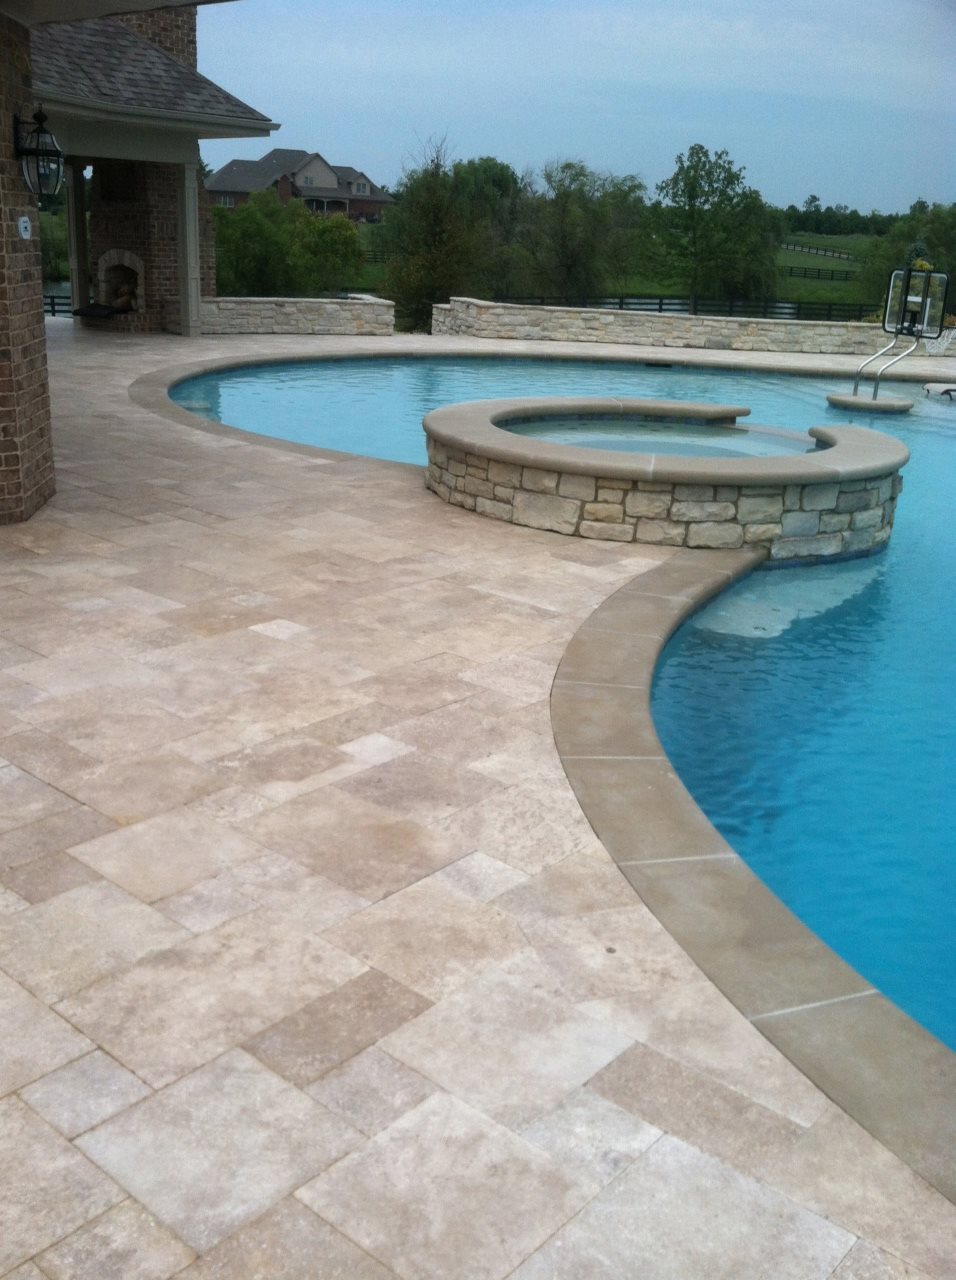
Travertine is the perfect choice for any pool deck. In the last few years, we have been installing more and more travertine pavers around swimming pools which is an absolutely beautiful look.
Before 9/11/2011, 90% of travertine was imported from Italy and the price wasn’t as attractive as it is now. Soon after the 9/11 attack, President Bush dropped the Embargo with Turkey, gave Turkey 20 billion dollars and lowered tariffs (to have military based in Turkey). Now, almost all of Travertine is imported from Turkey and it’s cost is very attractive. You can also find travertine imported from Brazil and India, however, not only is it a lower quality we choose not to purchase travertine imported from these countries because they don’t follow child labor laws.


Why is travertine good for pool decks
Other than aesthetics, there are many other characteristics that make travertine great for pool decks; its resistance to heat, mold and that it’s slip resistant are just a few. The ADA (Americans with Disabilities Act) is a federal code that requires a static coefficient of friction of 0.05. Travertine ranges from 0.06-0.07. To put it into perspective, most concrete pavers rate a 0.07. It’s travertines dimples and cavities that makes it slip resistant. If you plan on sealing your travertine, we recommend that you use a water based sealer and only apply one coat.
Travertine Pavers are able to withstand cold weather conditions given that they have been properly installed and are premium grade. They are not only able to withstand freeze-thaw cycles but also extreme heat, their natural coolness provides an excellent walking surface for bare feet.
Travertine will initially cost more than concrete pavers. However, travertine will keep it’s color indefinitely, compared to other options like stamped concrete or even concrete pavers which will all fade in time.
Travertine Pavers are highly durable; they have been in nature for thousands of years and in freezing temperatures. It is the highest in compressive strength at over 17,000 psi; compared to stamped concrete which is typically 4,000 psi and concrete pavers which range from 7,000 psi – 10,000 psi.
Not all travertine is the same
Different grades
Premium Grade Travertine – This grade of travertine are selected to have consistent coloring throughout the crates, and the only limitation about holes (again this varies by producer) is either “no large holes” or “no holes/fill all the way through each tile.” They will also specify no chipped or cracked edges, and that the tiles/slabs be the same thickness throughout. It’s important to understand that the dimples and cavities in travertine is natural; you just want to stay away from excessive holes, especially the ones that go all the way through the stone.
Standard Grade Travertine – The definitions are similar to first grade, but each supplier uses looser language. They generally call for consistent color; one advertises “double-filling,” but doesn’t specify if the second fill is done by hand, as is done with their first grade of travertine. Large filled holes are allowed; some filled holes through full thickness allowed. This grade is typically what you will buy from most online suppliers even though they claim it to be premium grade because there is no published “official” documentation about grades of travertine therefore the grades are just a matter of opinion.
Commercial Grade –Wide light/dark color variation, with gray or black inclusions allowed. Defects in honing and sizing allowed. Small unfilled holes allowed; no hand filling, large filled voids allowed, non-stop holes allowed (from the bottom to surface). Cracked and broken edges permitted. Delivered without any color selection or sorting.
Typically, the cost of premium travertine delivered will run between $5-$6 per sq ft. Chances are, if you’re paying less than this than you’re probably not getting premium grade travertine. Be weary of the ‘Free’ samples. Often times online suppliers will sort out the best of the best and set those pieces aside for samples. If you’d like to know where we get our travertine, click here.
As you can see, travertine pavers are heat resistant, they won’t burn your feet in hot summer months, they absorb water to help prevent slips and also help prevent flooding – AND THEY ARE BEAUTIFUL especially around pool decks.
Travertine Installation
We offer an installation process that works with the climates found in the midwest. Since most of the travertine enters the US in Florida, most of the published installation procedures are based on that climate. If you’re interested in speaking with us regarding the installation of travertine around your pool deck, we would be happy to help. We primarily offer installation in the Ohio area (Dayton, Cincinnati, Columbus), however, we also often install outside of this area for larger projects (1,000 sq ft +). For larger projects we are able to travel to Michigan, Kentucky and Indiana. If you’re project is really large (5,000 sq ft +) we will consider traveling further.
Please contact us here for travertine installation.
If you’re looking to buy high quality travertine pavers, click here for our travertine supplier.
A long lasting brick patio, driveway, or walkway is the result of a properly installed base. As with anything, foundation is the key. By the time you’ve finished reading this post on paver base installation you should know almost everything you need to know about properly installing paver base.
The first thing we must do is consider the excavation depth. The determining factors include things such as paver thickness and the application of the surface whether it be for pedestrian or vehicular use. Now there are a lot of advanced factors that can be considered, however, I’m just going to cover the basics and as a rule of thumb should be all that you need to achieve a structurally sound foundation for your paver surface. So to determine the excavation depth we need to know the thickness of the paver and the necessary thickness of paver base.
Determining the paver base depth is actually very simple. For pedestrian only applications, it is adequate to have a 6″ paver base depth. For light to medium duty vehicle applications it is adequate to have 10″ of paver base. In some locations paver base is deemed unnecessary, i.e. Florida. However, I say paver base is necessary regardless of the location.
Installing the paver base
Once the area has been excavated to the right depth and width (excavate wider by however many inches you have in base depth on each side) it’s time to compact the subgrade. For certain, there are more advanced techniques that we follow in compacting and testing subgrade compaction, but for the sake of the do-it-yourselfer I’m just going to give you the basics. Start by spreading a 1″ layer of the paver base material over the subgrade and run your vibratory plate compactor over the paver base 2 times in each direction. This will give a pretty good compaction to the subgrade preparing it for the remainder of base to be installed (high clay soils may require additional compacting techniques to achieve prime compaction as clay is compacted by kneading rather than vibrating).

Continue by adding paver base material in lifts or layers of 2″ at a time and compacting each lift twice in each direction. You may need to add moisture to the paver base material if it is dry. An indicator of dry paver base is dry dust being generated during compaction as well as material piles or trails that are created by the sides of the compactor.
Once you have lifted the paver base to the proper height it is important to check for low and high spots. As a rule of thumb, we generally try to achieve no more than a +/- 1/4″ variation in paver base height. The paver base should resemble the expected final patio/driveway appearance leaving way for a consistent 1″-1 1/4″ sand setting bed.
Notes: It is important that during compaction the entire plate be in contact with paver base material. Fill in any low areas or level off any high areas in the paver base prior to compacting. If a compactor approaches a small low spot, the plate of the compactor will bridge over the low spot and that particular spot may never receive compaction resulting in future settling of the paver surface.
[box type=”info”]Download our detailed step-by-step guide to proper paver base installation
[/box]
[one_half]
[/one_half]
[one_half_last]
[/one_half_last]
Leave us a comment!

It seems that more and more people are interested in building a raised paver patio. It gives elevation, dimension, and yard separation. What most people don’t know about raised paver patios is the failure rate. In the world of hardscaping (term used to describe the installation of interlocking patios and retaining walls), raised paver patios are among the most difficult installations to pull off successfully. Here is why:
The first thing I would suggest is remove all landscapers from your bidders list. Landscapers, although this doesn’t apply to everyone of them, can typically install simple patios and hardscape projects, but building a raised patio requires a company that has a tremendous amount of experience installing only hardscape projects to understand what to do and what not to do when building a raised patio.
The number one reason for raised patio failure is improper installation of fill and improper fill material selection. Fill is the material used to fill the void between the bottom of your pavers and the ground. In most instances, if you’re building a raised patio, you will be adding a substantial amount of fill material. It’s important to never use soil/dirt. Dirt, without having VERY large compaction equipment designed specifically for the compaction of dirt, is almost impossible to compact completely. I can almost guarantee if dirt is used as any type of backfill material below your hardscape, it will settle SUBSTANTIALLY.
Limestone 411’s for paver base in raised patio’s
Limestone 411’s aka Paver Base
So what do we use for fill material? The best option, depending on your location, is angular limestone chips with dust. In most places, this type of gravel is called limestone 411’s or limestone chips and dust. This is a mixture of 3/4″ angular pieces of limestone all the way down to dust. If you only used the 3/4″ pieces of limestone, there would be a lot of air pockets created in-between each stone allowing the stones to move around and settle after time. The addition of smaller stone pieces and dust combine together to achieve a very dense fill.
I almost forgot, NEVER EVER EVER use pea gravel or allow your contractor to use pea gravel. Pea gravel (very small round pieces of gravel) has been used under concrete for years as a base fill material. Could possibly be why most concrete you see is cracked (just kidding, but who knows?). Pea gravel is a highly lazy gravel, which means, under heavy loads the pea gravel migrates into neighboring soils because its round in shape and small. If you ever paid attention to where a driveway meets a garage floor you probably observed that the driveway was much lower that the garage floor. This is caused in most cases by the pea gravel under the driveway migrating into the material below the garage floor. If there is limestone 411’s below the concrete or paver driveway but there is pea gravel below the garage floor, the limestone 411’s could work its way into the pea gravel after time. In either case, we would use a geotextile fabric for material separation. Geotextile fabric is a tensile material used in stabalizing different soils and fill materials.

How do we compact the fill material? There are a couple important things to remember when compacting limestone 411’s. Have you ever picked up a handful of dirt that was bone dry and tried to compact it into a ball? It doesn’t work so well. But, if you add just the right amount of moisture, you have the perfect mud ball. The same thing applies to compacting limestone gravel. It’s important to add moisture to the gravel before/as you compact it. The moisture helps release the air and aids by bonding the dust to the stone chips. Secondly, its important to never compact more than 2-4 inches in depth at a time using standard mechanical compaction equipment. If you are a DIY, and plan to use a hand tamp, I wouldn’t compact more than 1″ in depth at a time. Make sure and buy plenty of gloves if you plan to use a hand tamp, as you will be tamping for a really long time. That being said, I HIGHLY recommend that you use a vibrating plate compactor to compact the base especially if you’re building a raised patio.
If by now you haven’t decided to hire a professional that specializes in the installation of hardscapes, you’re a brave soul.
Proper excavation prior to installation of fill material is just as important as the selection and compaction of fill material. Most will agree that 6″ of base below a paver patio is the proper amount. However, this doesn’t mean that you don’t have to excavate if your building a raised patio. I see it all the time; a contractor builds a raised patio and doesn’t excavate below the frost line and doesn’t remove the top soil. Top soil is simply organic matter like rotted roots and leaves.
So, you should still excavate at least 6″ prior to the installation of fill material for a raised paver patio.
Probably the third most common cause for raised paver patio failure is loss of fill material. If you’re familiar with all the general paver installation steps, you know that after the fill material aka the base comes the sand setting bed. Since the particle size of sand is so small, it’s easy for the sand to fall through the cracks/joints in the walls that build the patio up. You should always use a geotextile fabric to contain all fill materials when building a raised paver patio.
These are just a few of the most common causes that raised paver patios fail. Raised patio’s are typically much more labor and material intensive making them more expensive than paver patio’s closer to ground level. I can’t recommend enough times to contact a company that specializes in these types of installations.
If you’re located in Southwest or Central Ohio, please don’t hesitate to contact us for more information or to schedule a design consultation.
Thanks for reading- Mark Rhodus, President Two Brothers Brick Paving, LLC
If you’re not already, become our fan on Facebook for more great tips like these.
[one_half]
[/one_half]
[one_half_last]
[/one_half_last]
Leave us a comment!
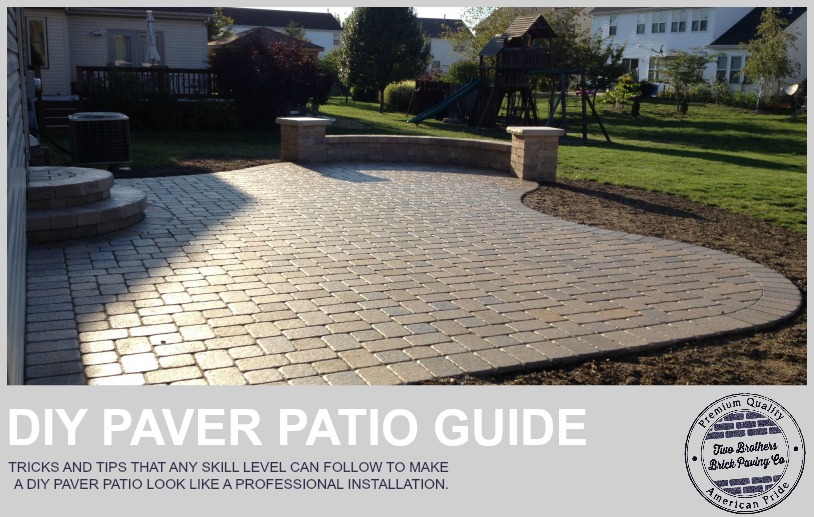
[box type=”download”] Thinking about installing a paver patio or paver walkway? Read this before you do. We offer a step-by-step installation guide for paver installation that will help you install a maintenance free paver patio (no weeds), a paver patio that doesn’t sink or settle and we’ll share 3 easy tricks that will make your paver patio not look like an amateur installation. [/box]
My name is Mark Rhodus, I’m the president of Two Brothers Brick Paving. I’ve been installing pavers for over 15 years. I was taught by a pioneer in the industry, the guy who installed the very first concrete paver in the United States. So tons of experience, tips and tricks that go back many, many years.
For many years, I’ve been asked by landscape architects and interviewed by industry magazines (like the Turf Design Build Magazine and Total Landscape Care Magazine) on how to properly install pavers. Throughout the years, I’ve taken what I’ve been taught and added to it as we learn more effective and efficient ways of installing pavers. I have a lot of potential clients call me ask if I can coach them through installing their paver patio. So, I’ve put together this guide, How to easily install a paver patio that doesn’t look like a DIY paver installation.
There is a lot of information on the internet on how to install pavers. I’ve always been amazed at how different each approach is. For the most part, these guides will get you from start to finish and you’ll have a paver patio if you follow the guide. However, what I think is missing from almost all of these paver installation guides is the years of tricks and techniques a paver installation professional puts into every installation to ensure that the paver patio will last and look like it was installed by a professional. It’s all in the details…but which details?
There are some common problems with most DIY paver patio installations as well as some misconceptions regarding pavers due to these improper paver installation techniques.
Prevent weeds from growing in your paver joints – this is huge.
I think the most common misconception that my clients have about pavers has to do with weeds growing in the joints of the pavers. Most people think these weeds grow up from the earth/dirt underneath of the pavers. That is incorrect. Weeds grow in pavers by seeds being blown onto the patio and depositing themselves into the sand in the paver joint. In my installation guide, I share two of the most important installation steps to prevent weed growth in pavers. None of our installed paver patios experience major weed growth in the joints for two main reasons:
- We control surface water. If rain water sits on your pavers and has no where to go, it will aid in the germination of weeds. A dry patio is key to preventing weed growth. In my guide, I’ll give you very detailed instructions on how to keep your patio dry and well drained. Also, a well draining paver patio helps naturally wash and remove seeds from the surface and joints of the patio before they have the opportunity to germinate.
- The sand that paver joints get filled with can be a breading ground for weed germination. So, over the years, we’ve discovered a couple different techniques and treatments that make the sand in your joints inhabitable for weeds. One of these treatments turn the joint sand hard like mortar making it impossible for weeds to grow. The second is an alternative type of sand that is readily available that will achieve similar results. In my guide, I’ll explain exactly how to decide which treatment is best for your paver patio and exactly how to do each process the easiest way possible.
[box type=”download”] Following my steps for preventing weed growth in your pavers will give you peace of mind and prevent a ton of unnecessary maintenance down the road.[/box]
Proper paver base installation is the key to a long lasting paver patio. Make sure you’re installing it correctly and using the correct paver base material.
There is a specific type of gravel that works best for paver base. When installed correctly, this type of gravel turns into hard surface similar to concrete. Most DIY installations don’t use this type of gravel. I’m guessing because they just don’t know about it. In my guide, I’ll share with you the exact gravel that we use for all of our paver installations. Gravel is named by numbers at the quarry. However, these numbers are different from one quarry to the next. I’ll share with you exactly what to ask for to make sure you’re getting the right stuff.
Once you have the right gravel, you’ll have to know how to install it. However, before you install and compact the gravel base, you’ll have to compact the soil that you’re going to put your gravel base on to. Without doing this step, you’re patio could quickly settle more than 1/2″ in 90 days or less. Most DIY guides do not mention how to compact the soil. I’ll share with you a trick to compact the soil using a little bit of your gravel base and a plate compactor.
Now that your soil, aka subgrade, is solid and compacted, you’ll need to begin installing your paver base. You’ll need to rent a vibratory plate compactor to properly install the paver base. Without it, your pavers could easily settle more than 1/2″ in 30 days or less. Every tool rental store across america rents these for about $50 per day. In my guide, I’ll show you how to properly use the plate compactor to achieve the best results. We recommend that a typical paver patio base be 6″ thick or deep. However, most plate compactors can’t compact 6″ at a time. I’ll share with you exactly how often you need to compact and also a trick to make sure that every inch of your patio has received proper compaction.
I’m sure if you’ve been doing some research on how to install pavers, you probably already were aware that you had to compact the gravel base. However, 9 out of 10 DIY paver patio installations don’t do this crucial step during the installation of the paver base. In order to achieve near complete compaction (if not your pavers will settle), you paver base must have the correct moisture content. This means that you must add water to the base during compaction. Water lubricates the particles in your gravel base making it easier for the gravel to consolidate and become compact. Adding to much water and you may have to remove all your gravel and start over. I’ll share with you an easy trick to know when your paver base has the proper amount of water in it to achieve optimum compaction.
Cheap insurance that add’s many years to the life of your paver patio.
There is a single step that you can do when installing your paver base that will add many years to the life of your paver patio and also compensate for any DIY mistakes made during base installation. Its cheap and easy to add, yet most DIY and even many professional installations leave it out. I’ll share with you exactly what it is and how to install it.
3 Easy ways to make sure your paver patio doesn’t look like an amateur installation.
When I consider doing any DIY home improvement project, what typically prevents me from going through with the project is my fear that my lack of experience doing this type of project will show in my work and decrease the value of my home instead of increasing it. So as I’ve put together this guide, I’ve thought about common flaws DIY paver patios have and how to show an amateur how to easily prevent them. I’m thrilled with the results. I think there are 3 common flaws on DIY projects that could be easily avoided and drastically improve the quality of the project making it look like it was professionally installed. Here they are:
- Wavy Pavers, a paver patio that is not flat is a dead giveaway that it was installed by an amateur. If you look across a paver patio and it appears to roll up and down instead of staying flat and sloping at a consistent slope across the entire patio, chance are that patio was installed by an amateur. In my guide, I’ll show you how to easily prevent this from happening during the installation process. These couple extra steps we do will make a huge difference in the finished look of your project. I’ll also share with you a really neat trick with a plate compactor that will smooth your pavers out like glass after installation.
- Curvy joint lines ruin a paver installation. The line that is made from the joints in the pavers must be straight. If it’s not, it will not look like a professional installed it. There are two steps to ensuring straight bond lines. I’ll show them both to you as well as how to straighten the bond lines once the pavers are installed (of course before you cut in the perimeter).
- Bad cuts. I can always tell a DIY paver installation by the cuts. If the cuts aren’t perfect, it makes the rest of the project look cheap. But making perfect cuts takes years of experience. We’ve developed a way to make perfect cuts every time by simply adding a paver border around the perimeter of your patio. I’ll show you exactly how in my guide.
Get my “How to easily install a paver patio that doesn’t look like a DIY paver installation” for $35.
In addition to showing you how to prevent weeds from growing in your pavers, making sure you get the right paver base, the importance of water in paver base installation, cheap insurance and 3 ways to make sure your paver patio looks professionally installed, I’m also going to:
1. How to calculate exactly how much paver base and sand you’ll need
2. What tools you’ll need
3. The products (edging, gravel, sand sealer, polymeric sand, etc) we use after years of trial and error
To receive a copy of our instructions on how to install pavers that last and look like a professional installation, simply click the yellow ‘Buy Now’ button below. We process our payments through Paypal for security reasons, However, it does not require that you have a Paypal account.[/box]
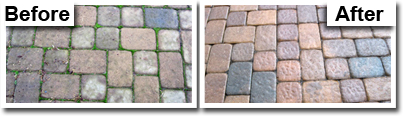
There’ s nothing more frustrating than having weeds growing between the joints of pavers. Before you know it, the weeds can take over and be almost impossible to remove.
I’m going to share with you a step-by-step way to remove the weeds between pavers, but before I do I want to talk about how the weeds got there in the first place.
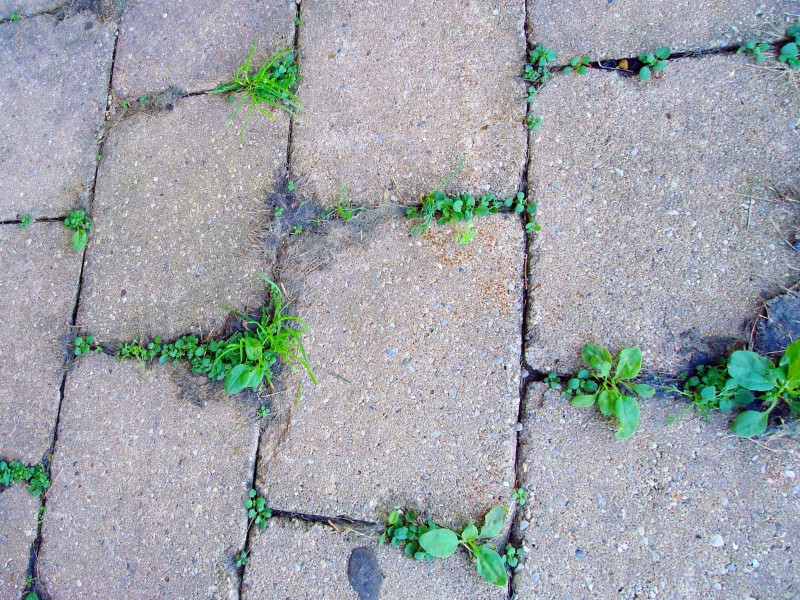
How do pavers get weeds in the first place
In my years, I’ve heard many explanations of where the weeds come from. In most cases, they were wrong.
The #1 misconception is that the weeds come from beneath the pavers. People that believe this, will ask us to install a weed mat beneath the pavers prior to installing them. However, this is not where the weeds come from and this certainly is not how you keep weeds from growing between your pavers.
99% of the time, weeds in pavers start from seeds blown in from weeds that are around the patio. Chances are, if you have lots of weeds in your pavers you probably also have lots of weeds in your yard. If you don’t believe me, see how Colorado State University says weeds start growing.
If your lawn is free of weeds, the seeds could be blowing in from your friendly neighbors yard. Once you have a couple weeds in your patio, they will start to spread. Some types of weeds like crabgrass can spread and take over your entire patio.
How to get ride of weeds in pavers
Before I share how we remove weeds from pavers, I want you to know that a properly installed paver patio will not grow weeds near as easily and if you follow the “How to keep weeds from growing between pavers” instructions at the bottom of this article, your patio wont grow weeds either.
I also wanted to note that weeds love a cool, damp environment. If your patio doesn’t have adequate slope to drain the water off the patio when it rains, chances are the sand in the joints will remain damp making them a thriving place for weeds to germinate and grow. If this is you, you’ll definitely want to get our “How to keep weeds from growing between pavers” instruction manual.
Step 1: Kill the weeds
There are many ways that you can kill the weeds between pavers. Bleach and Round-Up are a couple options, but we don’t like either of them for multiple reasons. They both are harmful to the environment, and the bleach can discolor the pavers. The solution, white vinegar. Crazy, I know.
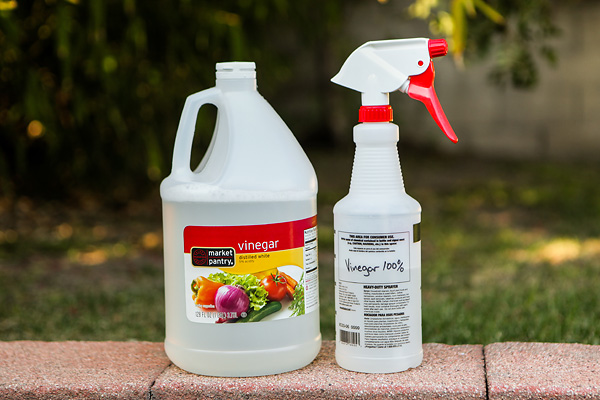
You’ll first want to do a test spot just to make sure the vinegar doesn’t discolor the pavers. Vinegar does have a small amount of acid, however, it’s usually not enough to affect the pavers. I still recommend that you do a test spot.
To do your test spot, spray the vinegar in a 2’x2′ area of your pavers. Wait a couple hours, then rinse off the pavers. If you don’t see any discoloration, you’re good to go.
We recommend using a pump up weed sprayer for larger projects. Empty the white vinegar into your sprayer and spray the weeds. Let it sit for a couple hours. Then rinse away.
Step 2: Remove the dead weeds
We remove the weeds by using a pressure washer. Typically, when we’re removing weeds from pavers for a client, we’re also looking to clean the pavers. A Pressure washer is great for doing both. We use both a spray wand and also a rotating surface cleaner attachment for the pressure washer. Both of these can be rented from most tool rental stores for less than a $100 per day.
Here is rotating surface cleaner attachment for pressure washers.
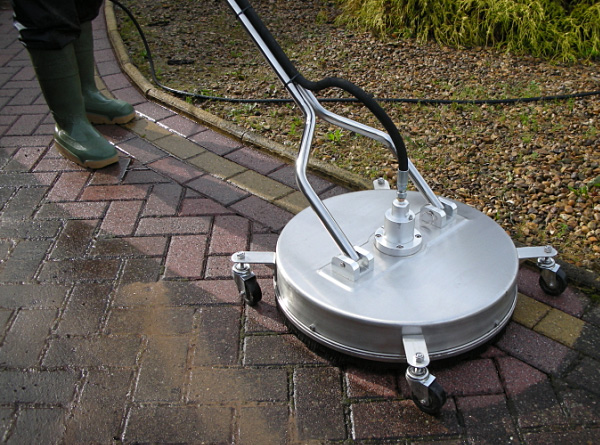
If your project is a larger area, you can save yourself a lot of time and achieve a better end result by utilizing one of these. However, you may still need to use the regular pressure washer wand to remove stubborn dead weeds from the pavers. The rotating surface cleaner does an amazing job at cleaning the pavers also.
You will NOT want to use the jet nozzle of the pressure washer as this can etch and cut grooves into your pavers. Instead, use one of the fan nozzles. Hold the nozzle about 12″ away from the pavers focusing on the joint. You’ll goal is to spray out the weed from the joint. If your joint is full of silt/dirt, you can also go ahead and blast that out.
Warning: Your pavers are setting on a bed of sand. If you’re not careful, you can blast the sand from beneath the pavers right out the joint. Once the weeds are gone from the joint, be sure to move on to the next one.
Keep the weeds from coming back
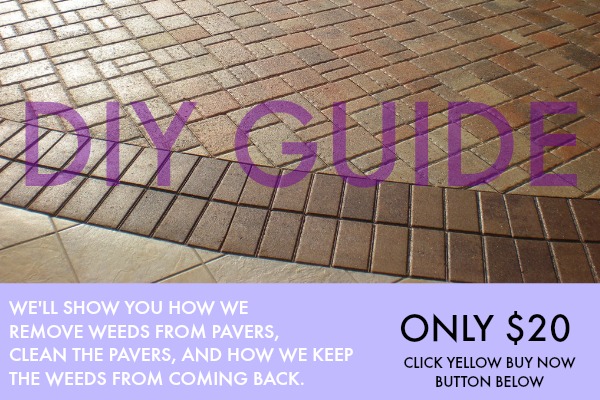
After you’ve invested all this time an energy in removing the weeds from your pavers, the last thing you want the weeds to do is return. The problem: unless you do anything about it, they will. We’ve developed a step-by-step system that you’ll want to do right after you finish removing the weeds from the pavers to keep the weeds from coming back. In addition, this process will enhance the look of your pavers almost making them look new again.
We charge our customers about $2 per square foot of pavers for this service, however, if you’re not located in our service area (Southern Ohio), we would be happy to share this process with you – which will save you hundreds. We just ask that you pay us a small fee for the time we’ve invested putting this together. In addition, we will be happy to answer any technical questions that you have after you’ve purchased the step-by-step program.
We specialize in installing pool decks in the Centerville, Liberty Twp and Dayton, Ohio area.
If you’re in the market for a swimming pool in the Dayton, Ohio area and area considering a pool deck made from concrete pavers, natural stone (bluestone or travertine) you will probably find that your pool contractor is really only concerned about the pool. Often times, the pool deck is just one more thing in the way of them completing the project and getting paid; and usually, pool contractors aren’t that knowledgable about pool decks and design. That’s ok though, let them stick to what they do best, building swimming pools. We believe the design of not only the swimming pool but also the pool deck is extremely important. We work with almost all pool builders in Dayton and can coordinate the design and installation of your pool deck with them.
Paver Pool Deck in Dayton, OH.
In most cases, your pool contractor will be happy to pass off this portion of the project. In some cases, pool builders/contractors will have their own paver installer or pool deck contractor. You will want to do your research on their subcontractor and even visit some of the pool decks they’ve installed in the past (preferably some that’s been down for a couple of years).
When it comes to pool decks, especially paver pool decks, its important to understand how pools are constructed to properly design and install a successful pool deck. For example, with a fiberglass pool the pool contractor will over excavate around the perimeter of the pool to give himself plenty of room to work. Once they’ve installed the pool, some pool contractors will simply push loose soil around the pool that will continue to settle and cause issues with your pool deck like in the picture below. Since we’ve installed so many paver and stone pool decks, we know what needs to be done to ensure a successful long term installation; and we can instruct your pool contractor on what they should do as it pertains to the pool deck.
We install paver and natural stone pool decks around gunite pools (concrete pools), liner pools and fiberglass pools. We install concrete pavers, brick pavers, travertine, bluestone, limestone and many other stone options.
One of our pool projects

We install pool decks in Dayton, Mason, West Chester, Springboro, Centerville, Oakwood, Troy, Maineville, Lebanon, South Lebanon, Englewood, Yellow Springs, Beavercreek, Miamisburg, Waynesville, and Springfield, Ohio.
Pool Design
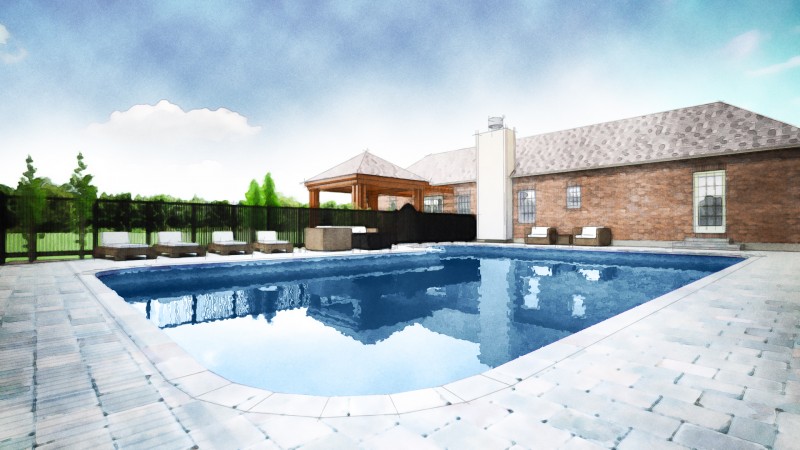
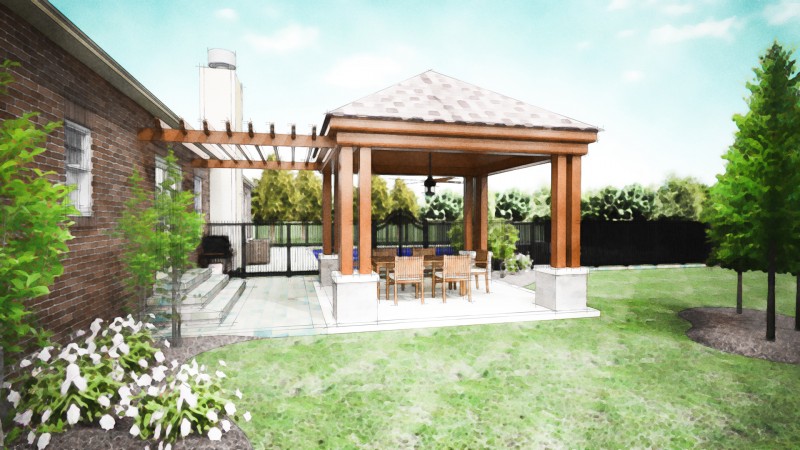
We also offer complete outdoor living space design that can incorporate the swimming pool, pool deck and landscaping all together. We work with our landscape architect and partner pool contractor to put together the total design. We can then manage the entire project including the installation of the swimming pool, landscaping, pool deck, and pool house.

If you think that we would be a great fit for your project, please contact us.